Voting

Saturday, July 16, 2011

Candyland


Candy Land (Candyland)[1] is a simple racing board game. It is often among the first board games played by American children as it requires no reading and minimal counting skills.

I think anyone under the age of 60, has played the game, "Candyland." The colorful board game with all the candy, represented in one form or another, takes you to a sweet wonderland. You didn't need to know how to read or count in order to play. So, at a young age, you could enjoy this game that would become everyone's favorite.

This month I am involved in a craft swap at "Yourpaperppantry.ning.com" and the theme is "Candyland." You have a partner you swap with and you send craft objects that deal with the theme. (Such as bright colors, game theme, etc.....) it's left up to each partner to interpret what that theme means to you.

Along with papers and embellishments, I thought it would be fun to make a mini album that showed the history of the game and the history of some favorite candy. I learned alot along the way.


In 1949, a woman with polio, invented the game for children who suffered from the same disease to pass the time while they recovered from their illness. Little did she know that this game would become an icon that millions of children would play for years.

My album shows each decade and the changes they made to the game. One thing that didn't change was the vivid colors.
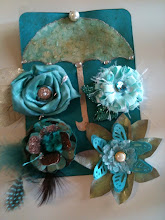
The cover of the album was a page I had had for years. I added a spinner, life savers and other embellishments to hi-lite all the colors and fun candy that was represented in the game.
Since this mini was made out of paper bags, each bag was an opportunity to put in craft goodies and some old fashioned candy.


Keeping with the theme, I made some journaling spots that looked like cupcakes, ice cream, and other treats.
For each decade, I had a picture of the game and tucked in a little info about a popular candy and it's history.
I made a charm to hang on the binder with charms, fragments and cute, colorful rhinestones.
So, I hope my swap partner likes my interpretation of "Candyland." I wish I had kept our game I had as a little girl. From the pictures, I think we had the 1960 version of the game. It supplied many hours of entertainment for me and my siblings.

Oh to be a child again; and only have to worry what color you landed on and dream about hershey kisses and gumdrops!

Tuesday, July 5, 2011

Tea Cup Tuesday


My "Teacup Tuesday" is a little different take. Growing up I loved everything about "tea parties" and the actual teacup itself. I loved the beauty of each one and how it made me feel grownup to be able to drink out of one of my mother's tea cup.
Now having 4 granddaughters, I thought it would be fun to make a "Tea party in a box", so I found a little miniature set of teacups and set out to make a traveling tea party.

I found an unfinished wooden box, painted, distressed it and covered it in girly papers.
I then started making different tablecloths, placemats, runners, napkins and centerpieces. I used different punches to create butterflies, flower punches, adding glitter, and even used metallic papers to create little "chargers" for a more formal look.
Using different fabrics, I made a lace tablecloth, a runner, and a more formal cloth so they could change it up a bit. I even found a miniature clothes hanger for the lace cloth.

Of course, you can't use the same centerpiece all the time, so I found a cake, candles and and made a little topiary.
All the little pieces fit in this small box with a drawer and the top of the box serves as the dining table.

I have made several custom orders for birthday gifts and even for a grandmother who was having a girl for her first grandchild.
I hope you enjoy my version of the "Teacup Tuesday" challenge and I have enjoyed seeing everyone's treasures.

Monday, July 4, 2011

The Shabby Tea Room Challenge

MONDAY, JULY 4, 2011

Week #69 - 'Happy 4th of July'

Hello shabby friends and welcome to another fun week of inspiration and creativity here in the Tea Room! This week Melissa is our fabby host and she has chosen the theme of 'Happy 4th of July' and asks that we create a card or project using this photo for inspiration ...


... and use RED, WHITE AND BLUE! Easy peesy :)

This challenge was an easy one for me. The 4th of July used to be one of my favorite holidays. So when I think back to those days, I think of when people used to get together with their neighbors, eat, and wait for dark to see all the beautiful fireworks.
I used the cricut to cut out the "white picket fence:- Bloom cartridge (cricut lite series),Paper Studio paper, gingham blue, Martha Stewart butterfly punch, doily cut in half, red & blue bling, ,(Recollection), vine ribbon, flag stickers by EK Success. Added some red and blue stickles to the fireworks.
We used to go to the lake every 4th with about 8 other families. There were probably 24 kids among all of us, and we had so much fun-trading comic books, walking to get snow-cones, water-skiing, even though we would got burned to the point of water blisters!
Now, the 4th of July has a different meaning for me. We enjoy "Independence." I understand that if it wasn't for men and women fighting for our freedom, some sacrificing their lives for perfect strangers, we wouldn't be able to celebrate all the freedoms we enjoyed as a child and now as an adult.
So "Happy Independence Day", may you have a safe holiday, don't eat too much, and put on sunscreen, and be thankful for all the freedom we enjoy today.


Sunday, July 3, 2011

Our Creative Corner


SATURDAY, JULY 2, 2011

Seasonal Celebration

Hi everyone - Sarah here, thanks for visiting us here at Our Creative Corner! A big thank you to everyone who has entered our Design Team Call so far - remember, you still have another week to be in with a chance to design with this amazing team!

This week I'm challenging you to get seasonal with your creation. Make a last minute 4th of Julycard or project or a Christmas in Julycard or project - this is the perfect time to get the jump on your Christmas stamping!
Since it's over 100 degrees out, it's hard to get in the "Christmas in July" mood, so I opted for a last minute 4th of July theme card.
I've been making stick pins and charms, so I thought I would add one to my card.
I wove some ribbons together, then cut out a with scalloped die cut. Layered a doily on cardstock and added flowers and embellishments.Ready for the next holiday and alot cooler weather!! Happy 4th of July.