Voting

Thursday, December 8, 2011

Mail Art


MAIL ART: Mail Art is a unique and fun way to send a letter or a box. There is nothing inside the item; the outside is the gift and it is created with your own special "form of art."


Several weeks ago, I took an online class called "Mail Art." ( Check out the site:http://theartofaltering.ning.com. ) They offer very affordable classes and you will learn some amazing ways to create some art. Mind you, I can't draw or paint, but you don't have to do either one of these, to create these mailable pieces of art.


I just started with sticky back canvas, and started collaging different items. I copied old pictures and reduced them to size. I also tore paper, distressed it and glued it down. There are no rules and the fun of it is , you get to personalize it exactly for the recipient of the card. The first picture is the night my husband and I got engaged. (he had hair back then!)
The other picture is one of my favorite. One Christmas we decided to do "home-made" gifts and it was the best Christmas ever. My sister in law, Carol, made us all our own aprons.

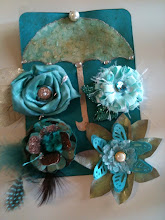
Ephemera is great to use on these cards. It just takes little bits and pieces, and it helps add interest.


I found some old sheet music out of a piano book that was about 100 years old and copied some of the music. You can find song titles that fit the person you are sending it to.

I wrote little "buzz words" that only the recipient and I share, and have special meanings between the two of us. I slipped them through out the pages.


Other items I used were gesso, glitter, and rubber stamps. Really, the sky is the limit and there is no right or wrong way to create these gifts!

I sometimes save old cards and I cut out focal features and glue them on the mail art; like the tree shown here in the picture. I then added glitter and pearlized paints. Rub-ons (the little x's and dashes) work really well on these items, as long as you "modge-podge" over it.


Since these will be actually be going thru the mail, you have to have areas for the addresses. I used white gesso to make address boxes and a white gel pen to embellish them. I sealed them with modge podge after the addresses were added, so the weather would not smear them. You will also have to ask the post office to "hand cancel" these cards.


My little sister used to wear those "pointy" glasses and she hated them. This was a perfect opportunity to not only use this picture on the collage, but I made sure her picture was accentuated by circling it and adding an arrow. That way, everyone in the postal service was able to enjoy this lovely picture.


You can also sew on these cards. Just use a real sturdy needle and wider stitches. I added bits of lace and when they were completed, I folded the canvas in half and sewed around the edges.

Liquid pearls is a fun product to add to get a flat back pearl look without adding the bulk of plastic pearls.

I really encourage you all to make some of these. They could be your Christmas card and gift rolled into one.
When I took my "Mail Art" to the post office, the employees had never seen anything like them. Just think, as these go thru the different post offices, your gift is blessing everyone on it's way to it's final destination. Just a little tip- if they are perfectly square, it costs more. I have no idea why. Mine measured around 5x5. They cost me a dollar per card in postage, but it's worth the smiles they will bring on postal workers and my relatives!

Monday, November 21, 2011

Canopy


    can·o·py

    verb /ˈkanəpē/ 
    canopied, past participle; canopied, past tense; canopies, 3rd person singular present; canopying, present participle

    1. Cover or provide with a canopy
      • - a canopied bed
      • - the river was canopied by overhanging trees

    noun /ˈkanəpē/ 
    canopies, plural

    1. An ornamental cloth covering hung or held up over something, esp. a throne or bed

      • Something hanging or perceived as hanging over a person or scene
        • - the canopy of twinkling stars

      • A rooflike projection or shelter
        • - they mounted the station steps under the concrete canopy

        One of the things I love to do is to help create accessories for little girl's bedrooms. Especially when there is a theme!!

        Our youngest granddaughter's room is "Hawaiian vintage surf." The colors are pink, green and white.


        She does not sleep in a crib; it's called an Amby bed. It hangs from a spring and her movement gently swings her to sleep. When I first heard they were using this for her older sister, I didn't know what to think! But, sometimes change is good and they sleep very well.

        I made some casings to go over the Amby holder to spruce it up a little. They also wanted a canopy to go over it, so out of an embroidery hoop, 15 feet of organza and really aggresive glue and tape, I was able to construct one. (I will put up a tutorial on next blog on how to make it. Not really hard at all.)
        Of course, to give it a tropical look, we found some beautiful pink hibiscus flowers to add to the front opening.


        I made a diaper organizer to hang above her changing table. She can keep diaper cream, wipes, etc. in each compartment. I found some bamboo buttons and I thought it would go along with the tropical theme.

        For the window treatments,my son constructed a "cabana-like awning from pvc pipes. I then made a pattern to cover it. I found children's pink raffia skirts and cut them at the seam. I hot glued them on the over-hang for a "fringed-cabana" look. I took pink floral leis, cut them and hot glued them at the bend of the awning. For the drapes, I took and layered 2 different fabrics, and then at the bottom, I added part of a raffia shower curtain.

        I made a couple of "neck roll" pillows for the bench in front of the drapes.

        I found a plain picture frame and added some tropical scrapbook paper, trim, and raffia and then hung a couple of sea shells from it.

        This past weekend there was a charity Christmas tour, and our son's house was one of the 5 houses on the tour. He put up 8 trees through out the house and one was in Giavauna's room. It was decorated in "beach wear" and I put a skirt under it and added more pink raffia skirts.


        Our oldest son is a homebuilder (www.jeffclickhomes.com) and not only built our home, but built his beautiful home next door to us. He is so creative and his creative style is shown in each of the homes he builds. His touch is very present Giavauna's room. He added a little bucket, filled it with sand and added some fun accessories. A pink andirondack chair with a surfboard backing is one of Giavauna's favorites.

        Even though Giavauna will probably never remember this room, her Nindy loved making some of things for her "surf room." Until the next theme change, mommy, daddy and her grandparents will enjoy it.

    Monday, November 7, 2011

    Shabby Chic


    • Shabby chic is a form of interior design where the style reflects:


    • Accessible, affordable, comfortable and eclectic, this popular style features white painted furniture, painted motifs, muted colors, slipcovers and vintage fabrics.

    • A look reflecting casual and relaxed lifestyles. Emphasis is on a soft touch, neutral colors and often a puckered, washed or unfinished look.

    • A style of scrapbooking that includes sanding, crumpling, and distressing paper to give an old and worn look to your page.


    For some reason, I love the "Shabby Chic" look. I guess because it uses soft colors, a bit vintage looking, and reminds me of a "yestayear" I should have been born in.

    Whenever I create something, it always seems to reflect this certain style. I know it's not for everyone, (just like my mother's "Early American") was not my style. But I think your home should reflect "you" and what is pleasing to your eye.
    November is a busy month for birthdays in our family. I enjoy making my own gifts and cards. (I truly believe a hand made card or gift shows the love you have in your heart for someone)

    Here are a couple of things I have worked on this month: This is a set of note cards and it's holder.

    Here's another Domino book I made.

    Here are some cards I've made for family members or friends.


    So as you can see, "Shabby Chic" is muted pastels, very feminine and has a soft, vintage look to it. I hope the recipients of my cards and gifts enjoy them as much as I love to make and give them.

    Thursday, November 3, 2011

    Banners

    ban·ner/ˈbanər/


    Noun:A long strip of cloth bearing a slogan or design, hung in a public place or carried in
    a demonstration or procession.


    \


    Banners are becoming very popular in the craft world. It's a fun way to express creativity, to introduce a name,or to decorate at showers.

    A friend asked me to make a baby banner for a baby shower, and the theme is birds in the pastel colors. Pastel are my favorite and with the help of a "Cricut" machine, the die cuts are endless to help create banners.

    I first cut out the bird cages from glittery cardstock.


    Since the cardstock was white, I used chalks or inks to color each one very lightly. I then cut out the birds from different pastel papers and just to make them stand out, I went around each bird with a fine tip black marker.


    I then cut out the letters and background squares, also going around the edges with a fine tip black marker. Some of the background squares, I ran through an embosser using a bird embossing plate.


    I then started building on the bird cages with flowers, bling and other accessories.

    You can use many things to connect each individual banner, but I chose a soft pastel pink tulle. It just seemed soft, delicate and like a baby girl.


    I added extra birds in between the cages and added some green vines.

    Banners are so much fun to make and the themes are endless. Here are a couple of other banners I've made:


    So, I hope the new baby girl and her mommy enjoys her "baby banner" and grows up to love little birds!

    Monday, October 17, 2011

    Dominos


    dom·i·no

    noun \ˈdä-mə-ˌnō\
    plural dom·i·noes or dom·i·nos

    : a flat rectangular block (as of wood or plastic) whose face is divided into two equal parts that are blank or bear usually from one to six dots arranged as on dice facesb plural but usually sing in constr : any of several games played with a set of usually 28 dominoes
    Years ago, game pieces, well, they were used to play the game. Now they are in big demand in the crafting world. Crafters have come up with numerous ways to alter game pieces and use them in their art.

    Scrabble pieces are used on art, instead of regular letters. Spinners, from games, are used as clock pieces. Bingo cards and numbers are used from cards to journaling pages.

    So, only the imagination, is what limits what you can do with these little pieces of art.

    I recently came across a website, "Creativeworkshops.ning.com" that offer online classes. I signed up for the "altered domino book" class and I'm loving making these little mini books!

    Basically, you can use any domino, ink it up, and decorate to fit any occasion, or custom make them for someone special using old pictures.
    Each page is different, and you can add little bits of lace or bling.
    There is no right or wrong and this is a good way to use little bits of paper and tiny pieces of ribbon or lace. I cut out the word "Faith" out of acrylic packaging that was the back of some flowers. I used an old button from my grandmother's button jar.
    I cut out a butterfly from a paperline and stamped some script and put a rhinestone on top.
    I inked around the page to give it a vintage look and sewed lace at the bottom of the page.
    You attach the pages, decorate and tie with ribbon. Very easy, lots of fun to make.

    I have more dominos inked and ready to assemble. Give it a try and let me see your "game piece work of art."